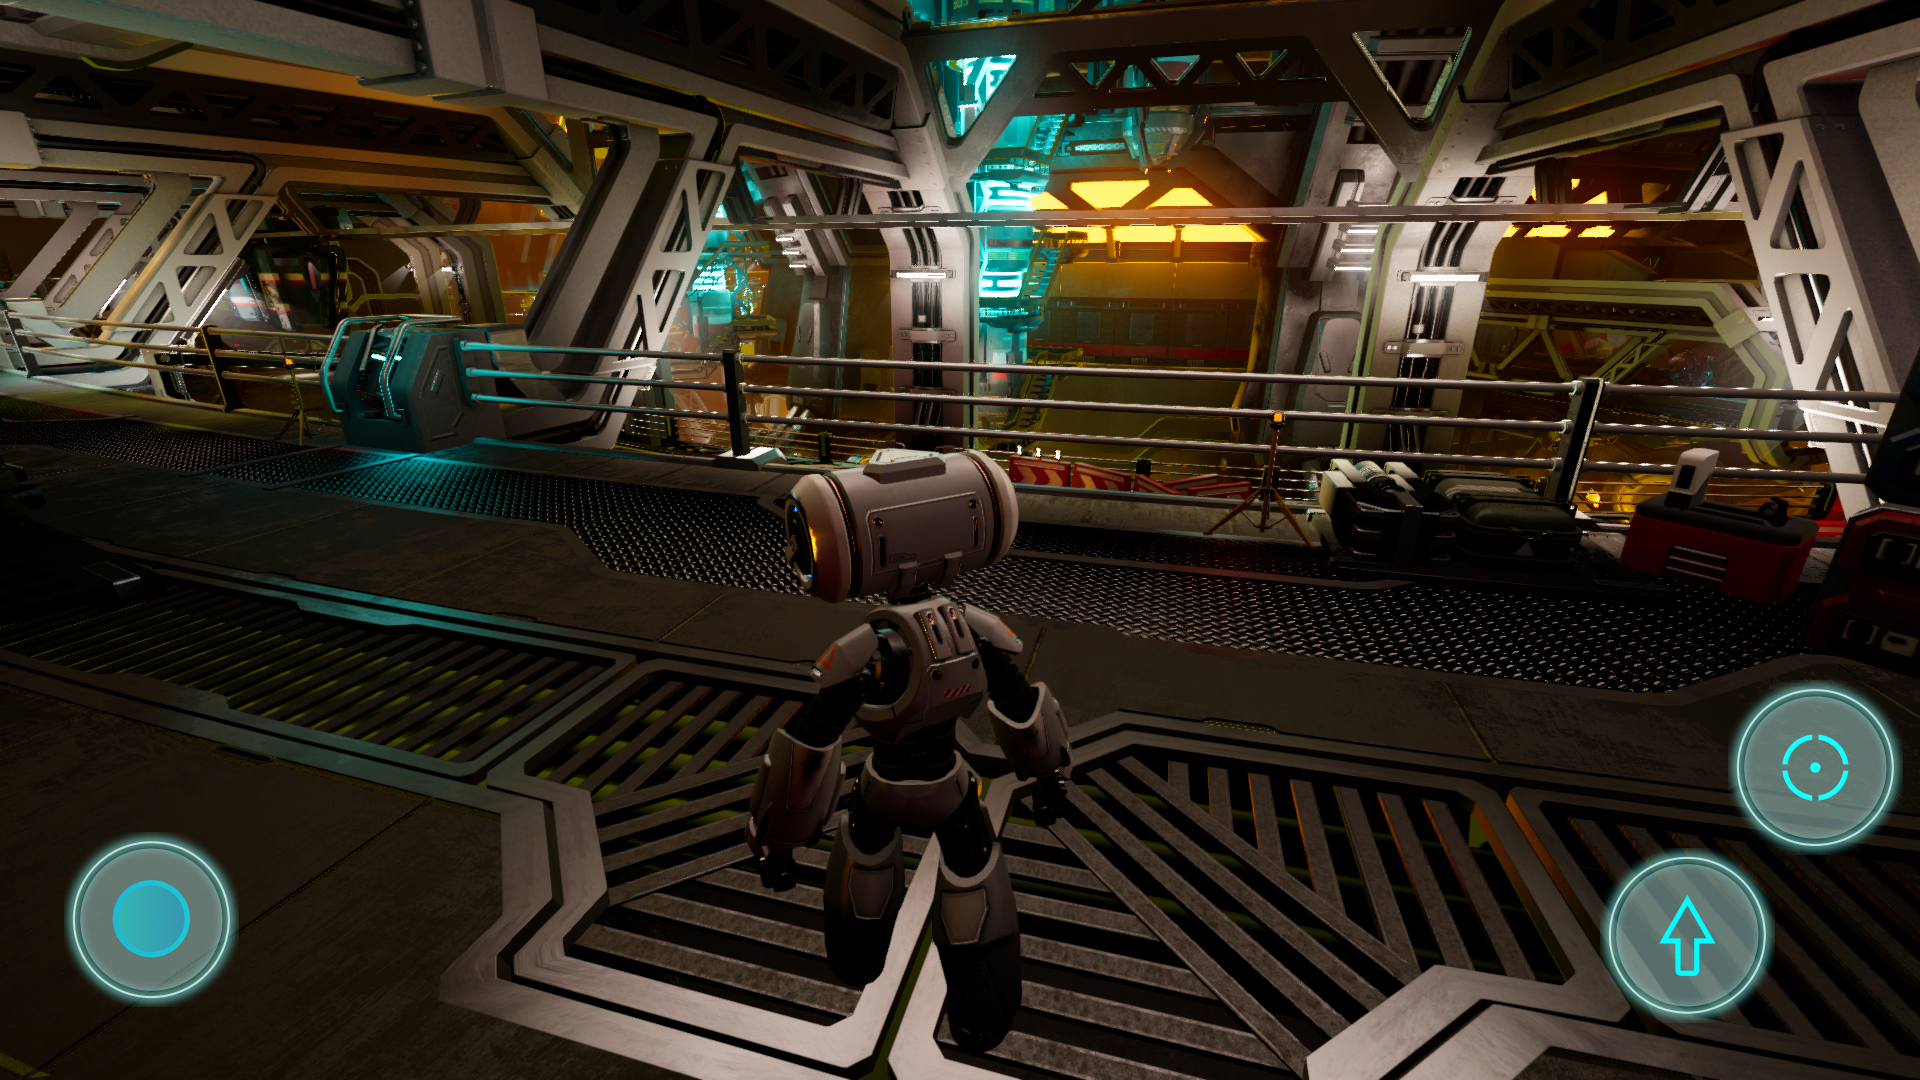
Godot Tutorial: Porting Your Game’s Controls for Mobile Devices
How popular is mobile gaming? According to a 2022 study by data.ai and IDC, mobile gaming is set to capture up to 60% of the total gaming market. As a result of this trend, more game developers are porting their games to mobile in order to reach this two billion+ person audience. However, there are several factors to mobile game development that must be considered to ensure your game can be enjoyed to its maximum potential. One of those factors is adapting your controls to be friendly with touch screens.
By leveraging Godot Engine‘s scene and input systems you can easily add a whole new control scheme to your existing game. In this tutorial we will cover how to do just that!
Tutorial Prerequisites
- The official Third Person Shooter demo (TPS demo) from the Godot Engine GitHub.
- Either Godot 3.5.1 or Ramatak Mobile Studio 3.5.1
- And of course, some knowledge about Godot Engine. For those just beginning with Godot, or those who need a refresher, check out the official Godot Engine Documentation to learn more about using Godot.
A Note on Touch Screen Buttons in Godot
Before beginning the tutorial, a note on touch screen buttons in Godot. Godot has a special node dedicated to adding buttons to touch screens: the TouchScreenButton node. The main difference between this and the regular Button node, is that the latter does not support multi-touch out of the box. Specifically, normal Godot buttons do not allow the user to press multiple buttons at the same time. Since we will be adding jump, fire, and movement buttons this would be a problem!
We we could show these buttons only when there is a touch-screen available. But as some notebooks also have a touch-screen, in this tutorial we will opt for the safer approach of hiding the buttons if we are not on a mobile platform.
Step #1 – Visually Creating the On Screen Controls
Let’s make a scene that contains all the buttons and the logic for our mobile controller. In the TPS demo project, create a new scene. Use a CanvasLayers as root node, and call it MobileControls.
As TouchScreenButton does not inherit from the Control class, we cannot set it in a fixed position in the screen with anchors and margins as we would do with regular Buttons. For this tutorial, let’s just use Control nodes to define the position, and add the TouchScreenButtons as a child of them. Make your scene look like this:
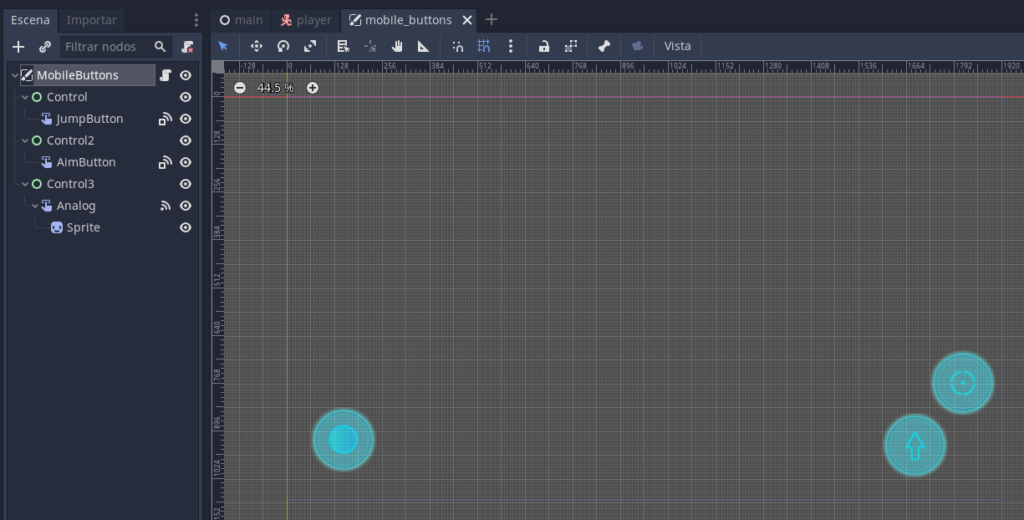
It is not the purpose of this tutorial to show how to position the Control nodes, but you can place them with the “Layout” menu in the top bar and adjust the position to the desired location with the mouse. As this game is in expand stretch mode, be sure to use the anchors correctly so the buttons move to the side of the screen if it needs to be expanded.
You can get the images for the controls here (Note that you have a variant for the button in the pressed state and another for the released state):
We are all set up to add logic to our scene!
Step #2 – Connecting the On Screen Controls to the Game
Go ahead and attach a script to the root node of your MobileButtons scene. Let’s start by adding some variables we will need later:
extends CanvasLayer

var analog_pressed := false
var analog_offset : Vector2 = Vector2.ZERO
var analog_size : Vector2

onready var player : Player = owner
onready var analog := $Control3/Analog
onready var analog_center := $Control3/Analog/Sprite
The character controller in this demo is already coded and included. It would be nice if we could reuse that without needing to rewrite the logic for our new touch-screen controls. Fortunately, Godot allows this with the Input system. It’s possible to fire an action defined in the input map through code, and we are going to use this feature to program our controls.
Let’s start with the easiest one, the aim button. Connect the pressed signal of that TouchScreenbutton to a method in the script and add this code to it:
func _on_AimButton_pressed():
    Input.action_press("aim")
When you press the aim button on your screen, the Input system will simulate a press event of the aim action. And thus, the game will react as if you had indeed pressed the input that was mapped to that action (right-click in this case).
Go ahead and do the same for the release signal of the aim TouchScreenButton:
func _on_AimButton_released():
    Input.action_release("aim")
For simplicity’s sake, just add this scene as a child to the player scene. Launch the game and you will be able to check that when you press the aim TouchScreenButton, the character will enter aiming mode.
We are going to use a very similar approach for the jump button, but first, we need to make a design sacrifice. There is not much useful space in a touch-screen to put our controls, as we cannot clutter the game with all the elements we need to replicate the exact gameplay than in PC. For that reason, in this case, we will use the jump button for both jumping and shooting. When the character is in aiming mode, we will use the button to shoot. When the character is not aiming, we will use it to jump. Connect the pressed and released signals of the JumpButton node to new methods in the script, and add this code:
func _on_JumpButton_pressed():
    Input.action_press("jump") if not player.aiming else Input.action_press("shoot")

func _on_JumpButton_released():
    Input.action_release("jump") if not player.aiming else Input.action_release("shoot")
With this simple code, you can now aim, shoot, and jump using your device’s touch-screen!
Step #3 – Adding a Virtual Analogue Stick
For the movement, we want to create something that emulates an analog stick from a joystick. If you created the scene as shown above, you have a TouchScreenButton called Analog with a sprite in its center. While this button is pressed, we can use the position of the mouse relative to the button to calculate the strength of the input on each axis as it if was a real analog stick. But first, we need to know when the button is pressed. Go ahead a connect the pressed and released signals of the Analog button to two methods, and add this code:
func _on_Analog_released():
    analog_pressed = false


func _on_Analog_pressed():
    analog_offset = analog.get_local_mouse_position()
    analog_pressed = true
We are going to use the analog_pressed value to check when the player is pressing the analog stick. The analog_offset variable is used to calculate the input always from the center of the stick, even if the player didn’t press exactly in the center.
We want to position the Sprite child of the analog stick in a position that represents where the player is moving. So let’s calculate that with the following code:
func _ready():
    analog_size = analog.normal.get_size()

func _process(delta):
    if analog_pressed:
        var touch_position : Vector2 = (analog.get_local_mouse_position() - analog_offset).clamped(analog_size.x / 2.0)
        analog_center.position = touch_position + analog_size / 2.0
We need the size of the texture of the analog stick to be able to position the Sprite relative to the center of the TouchScreenButton. Then, in _process(), if the analog stick is pressed, we get the relative position of the mouse. We clamp that position to the analog texture radius. Note how we used the analog_offset to calculate the touch_position.
Now it’s time to calculate the strength of the actions. We will define a strength of 1 if the player moved the stick to a distance greater or equal to the radius in any axis, and a strength of 0 if the stick is in the center of the TouchScreenButton in that axis. We can do that by adding the following code inside the if statement:
var strength : Vector2 = touch_position / (analog_size / 2.0)
Input.action_press("move_left", 1.0 - strength.x)
Input.action_press("move_right", strength.x)
Input.action_press("move_forward", 1.0 - strength.y)
Input.action_press("move_back", strength.y)
If we release the Analog button, we have to release the actions, so we need to add the Input.action_release() statements to the _on_Analog_released() method we defined before:
func _on_Analog_released():
    analog_pressed = false
    Input.action_release("move_back")
    Input.action_release("move_forward")
    Input.action_release("move_left")
    Input.action_release("move_right")
    analog_center.position = Vector2.ONE * analog_size.x
We also use this method to return the Sprite to the center of the Analog node.
The resulting script should be like the following:
extends CanvasLayer

var analog_pressed := false
var analog_offset : Vector2 = Vector2.ZERO
var analog_size : Vector2

onready var player : Player = owner
onready var analog := $Control3/Analog
onready var analog_center := $Control3/Analog/Sprite


func _ready():
    analog_size = analog.normal.get_size()


func _process(delta):
    if analog_pressed:
        var touch_position : Vector2 = (analog.get_local_mouse_position() - analog_offset).clamped(analog_size.x / 2.0)
        analog_center.position = touch_position + analog_size / 2.0
        var strength : Vector2 = touch_position / (analog_size / 2.0)
        Input.action_press("move_left", 1.0 - strength.x)
        Input.action_press("move_right", strength.x)
        Input.action_press("move_forward", 1.0 - strength.y)
        Input.action_press("move_back", strength.y)


func _on_JumpButton_pressed():
    Input.action_press("jump") if not player.aiming else Input.action_press("shoot")


func _on_AimButton_released():
    Input.action_release("aim")


func _on_JumpButton_released():
    Input.action_release("jump") if not player.aiming else Input.action_release("shoot")


func _on_AimButton_pressed():
    Input.action_press("aim")


func _on_Analog_released():
    analog_pressed = false
    Input.action_release("move_back")
    Input.action_release("move_forward")
    Input.action_release("move_left")
    Input.action_release("move_right")
    analog_center.position = analog_size / 2.0


func _on_Analog_pressed():
    analog_offset = analog.get_local_mouse_position()
    analog_pressed = true
With this simple script, you should now be able also to move around in the game!
One last step is freeing this scene for platforms that are not mobile:
func _ready():
    analog_size = analog.normal.get_size()
    if not OS.get_name() in ["android", "iOS"]:
        queue_free()
What We Achieved
Now that we have added touch screen controls to the game it should be possible to move around and shoot from a mobile device. You have taken the first step to bringing your game to a whole new audience!
What’s Missing From This Tutorial?
In this tutorial, we didn’t cover the camera control, which would be needed in a real scenario. It’s also always nice to update the UI of a game to a small high-density screen such as those present on mobile devices. But don’t worry! We will cover those important elements of mobile game development in future tutorials. So stay tuned to the Ramatak blog for more on mobile game development using the Godot Engine.
If you have a Godot game that you’d like to publish to Android but setting up the whole tool chain seems daunting try downloading Ramatak Mobile Studio!