Introduction
At Ramatak, we are committed to providing the best experience for developing mobile games using the Godot Engine. In the competitive mobile industry, advertisements play a crucial role. As a result, we have dedicated our efforts to seamlessly integrating ad provider services into our platform.
That’s why we provide support for two major ad systems, AdMob and Meta. With this update, you can effortlessly incorporate Interstitial, Rewarded, and Banner ads into your game with just a few simple steps!
In this tutorial we will provide you with a step-by-step guide to add monetization to your games through ads, using Ramatak-Studio.
Prerequisites
Before diving into this tutorial you need to install Ramatak-Studio. So, if you haven’t yet, go ahead and get the version for your Operative System here. Our fork of Godot provides everything ready out-of-the-box to export to Android including ads and many other features.
Also, make sure to have your phone with developer mode enabled, and the options to debug and install apks through USB activated.
Different kinds of ads
Let us do a brief introduction of the kind of ads you can add to your game with Ramatak Studio. If you are already familiar with these subjects, feel free to skip to the next section.
there are different formats of ads that the developers can add to their games or applications. Ramatak-Studio provides support for this three kinds so far:
- Banner
- Interstitial
- Rewarded
Banner ads are rectangular ads that appear at the top or bottom of the device screen. They stay on the screen and don’t prevent the user from continue playing or interact with the application. They can refresh automatically after some time to show something different.
Interstitial ads cover the full screen instead. The users will not be able to continue playing until they close the ad. Is useful to put them between levels, for example, as you probably don’t want to interrupt the player in the middle of an important task.
Rewarded ads also cover the full screen, and give the user some reward for watching or interacting with the ad.
Which ad format to use highly depends on your game or application.
Setting up Admob
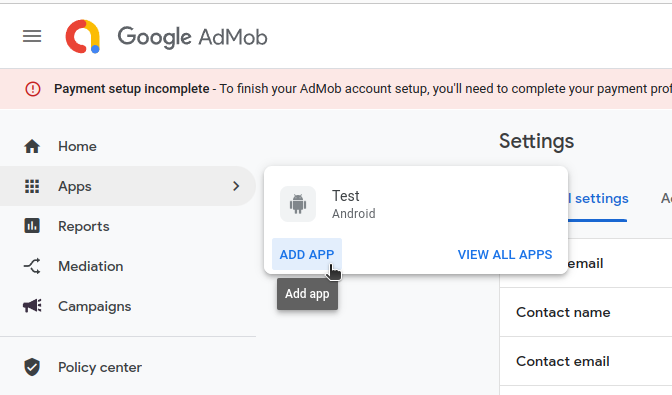
Open a browser and navigate to the AdMob website. You can log in with any Google account you have. Then, in the sidebar, press on the “Apps” menu option, and select “ADD APP”, as shown in the following image:
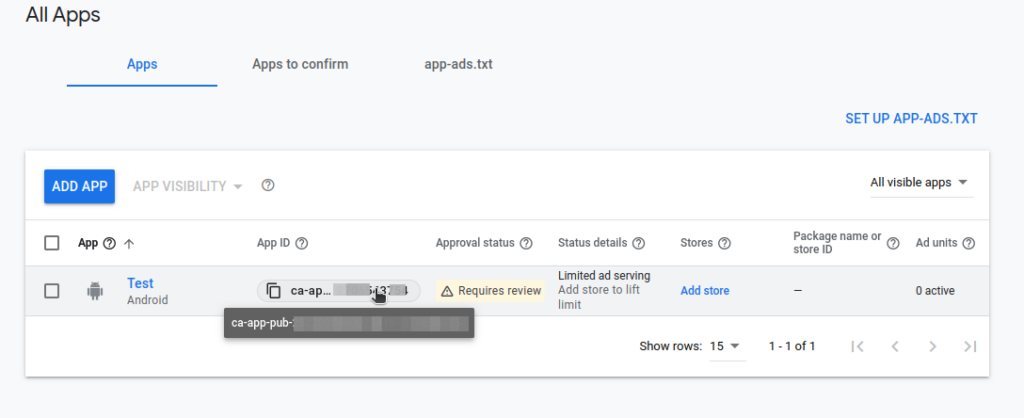
After creating the app, you can press the “VIEW ALL APPS” button shown in the previous image, to see a list of all your apps and their properties. We are interested in the App ID here, which you can copy by clicking on its field:
Setting up AdMob in Godot
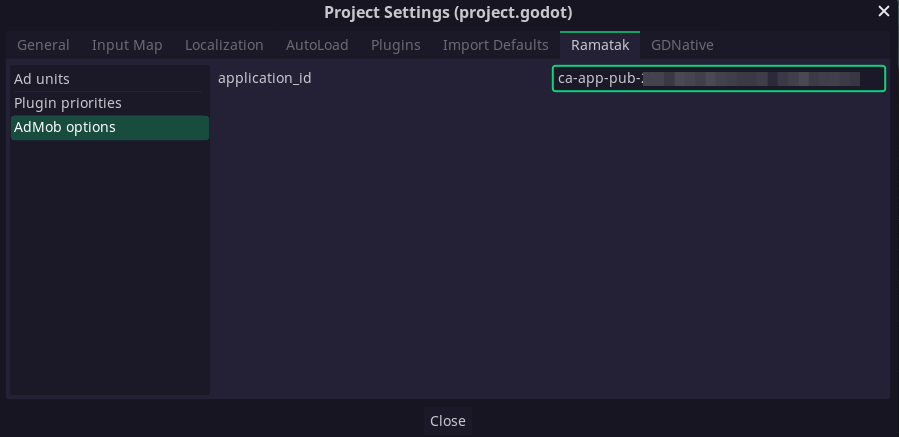
Open Ramatak-Studio and create a new project. Head to the “Ramatak” tab in the Project Settings. On the left side, you can see a list with some options. Press the AdMob options and paste your *App Id in the corresponding field:
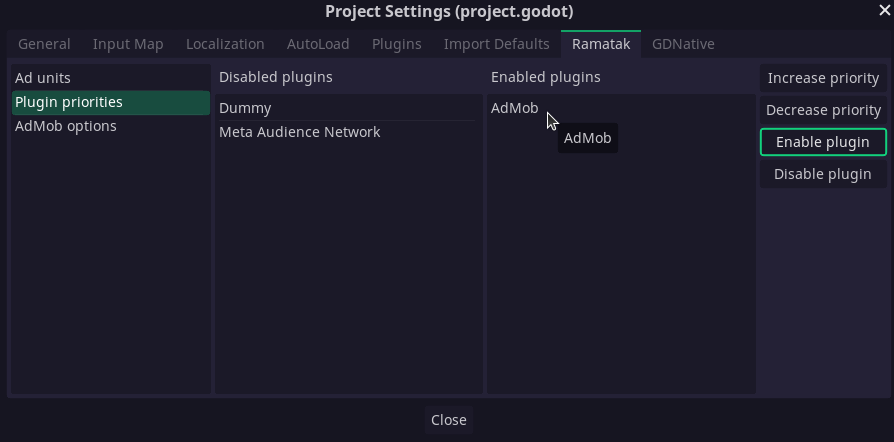
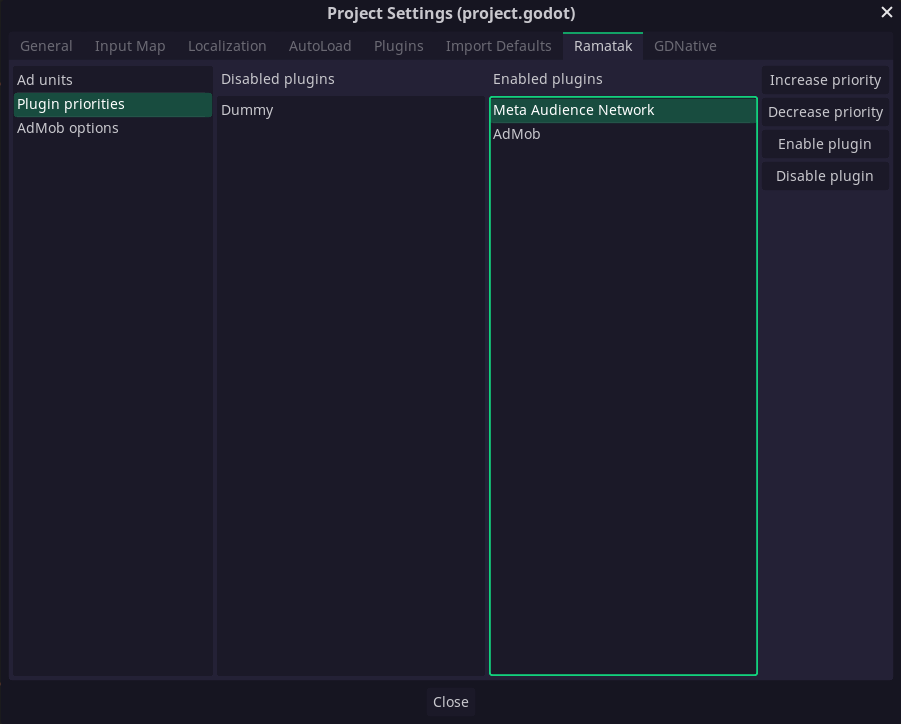
Also, make sure to enable the AdMob plugin under Plugin Priorities section:
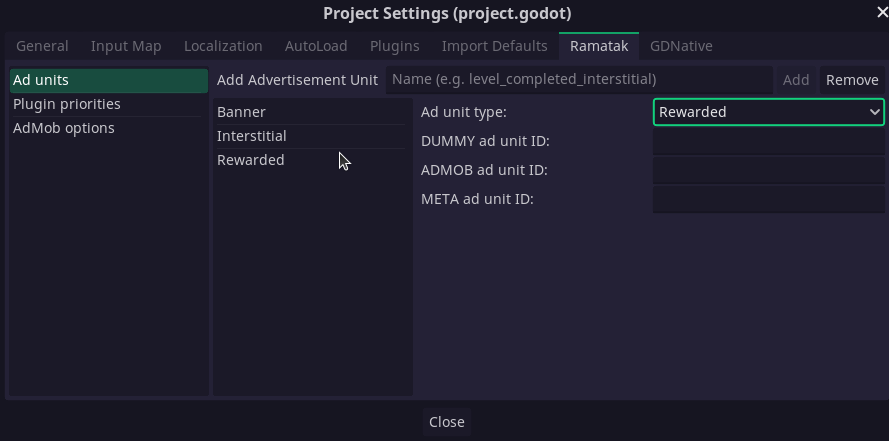
Then, in the Ad units category, let’s create three different units, one for each supported ad format. To do this follow these steps:
- Write the *Ad unit name in the line edit at the top. You can put any name but for testing purposes, I’ll just name them after the three supported formats. Let’s start with “Banner”, so write “Banner” in the field.
- Once you wrote the name, press the “Add” button. A new option with that name will appear in the list below.
- Select the newly added option called “Banner” and change the “Ad unit type” to “Banner”.
- Repeat for “Interstitial” and “Rewarded”.
In the end, your config should look like this:
We now need to define the Ad unit ID for each of the entries we just created. We still didn’t create those units on the admob side, but AdMob provides some test ids we can use to do a quick test.
Go to this page and copy the id in the table for the “Banner” format. Paste it in the ADMOB ad unit ID field of the corresponding ad unit in the configuration dialog:
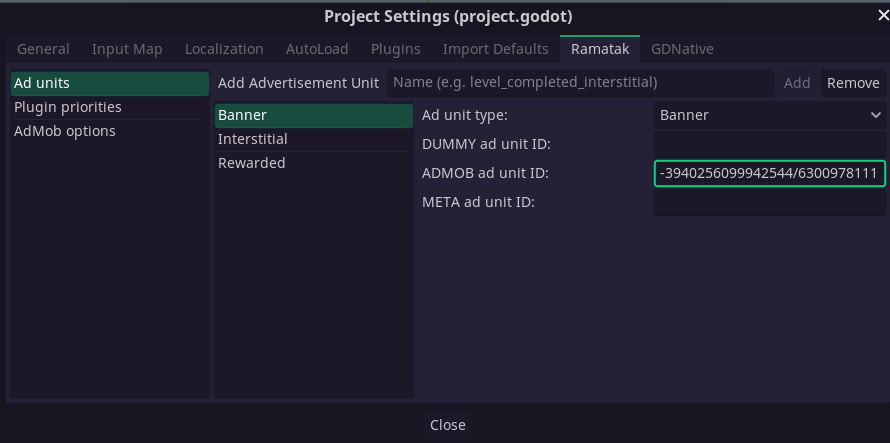
Again, repeat those steps for Interstitial and Rewarded formats. Finally, close the settings dialog.
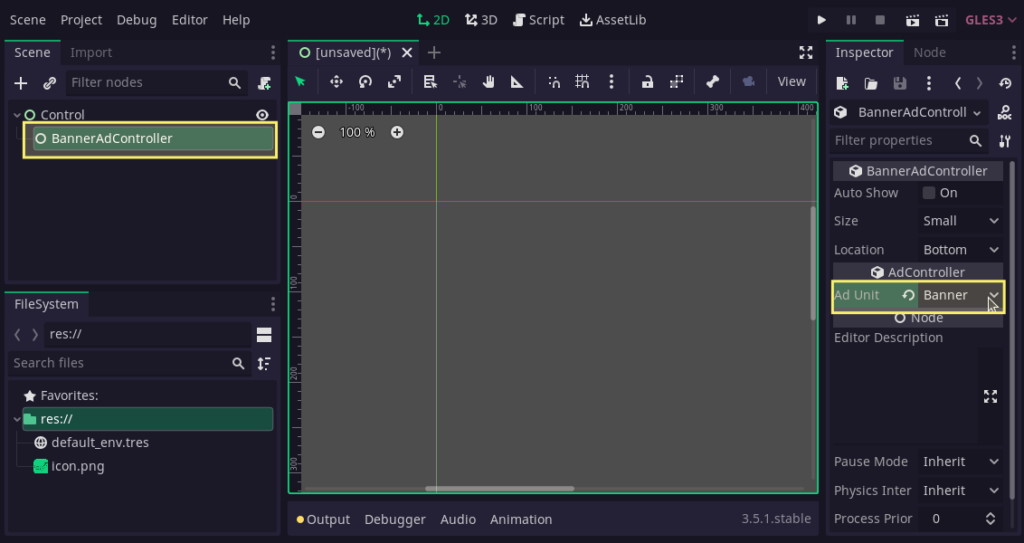
For a quick test, create a scene and add a BannerAdController node, and set the Ad Unit property in the inspector to “Banner”. Also, check the Auto Show option and save the scene.
You need to add the Android export option in the “Export..” configuration menu. Note that with Ramatak-Studio you don’t need to set anything up. Exporting to Android just works!
Finally, run the game on your phone and check that a little advertisement appears at the bottom of your screen. Congratulations! You got your first ad working!
Creating real Ad units
Of course, you eventually need to use real Ad unit IDs. So let’s head back to your AdMob control panel, select the app we created previously, and select the “App Overview” menu option from the sidebar:
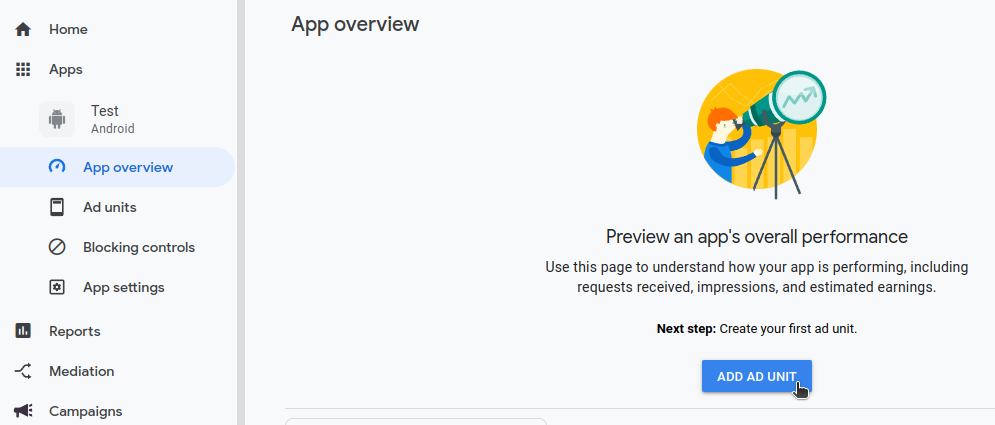
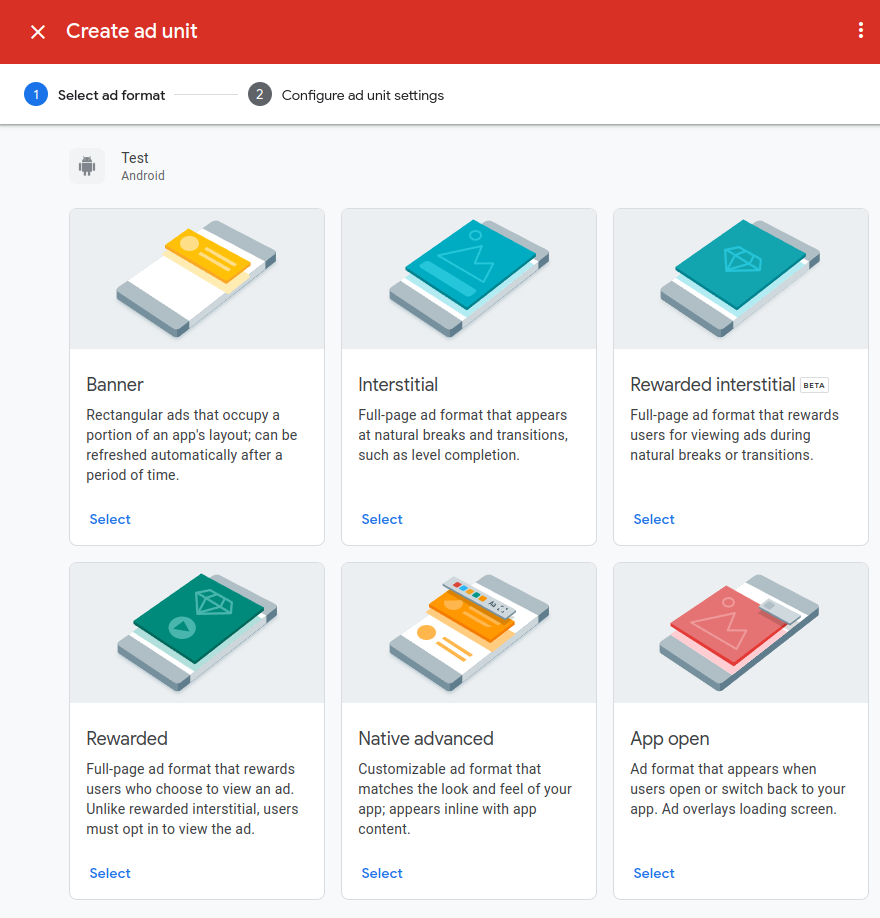
In there, you can press the “ADD AD UNIT” button to start. Let’s select the “Banner” format in the following menu.
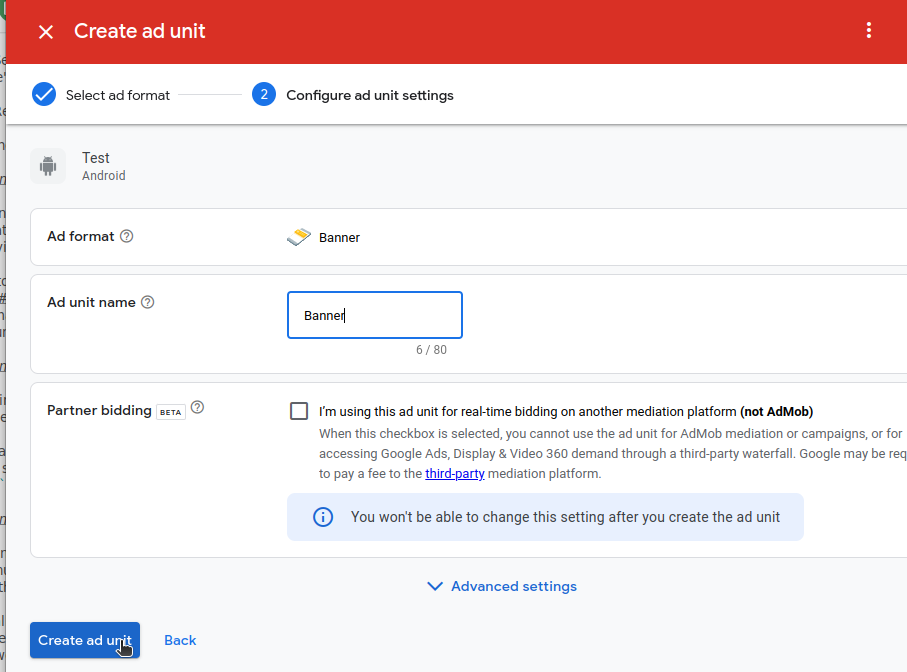
Give the unit a name on the next screen (I’ve used “Banner” as a name again), and press the “Create ad unit” button.
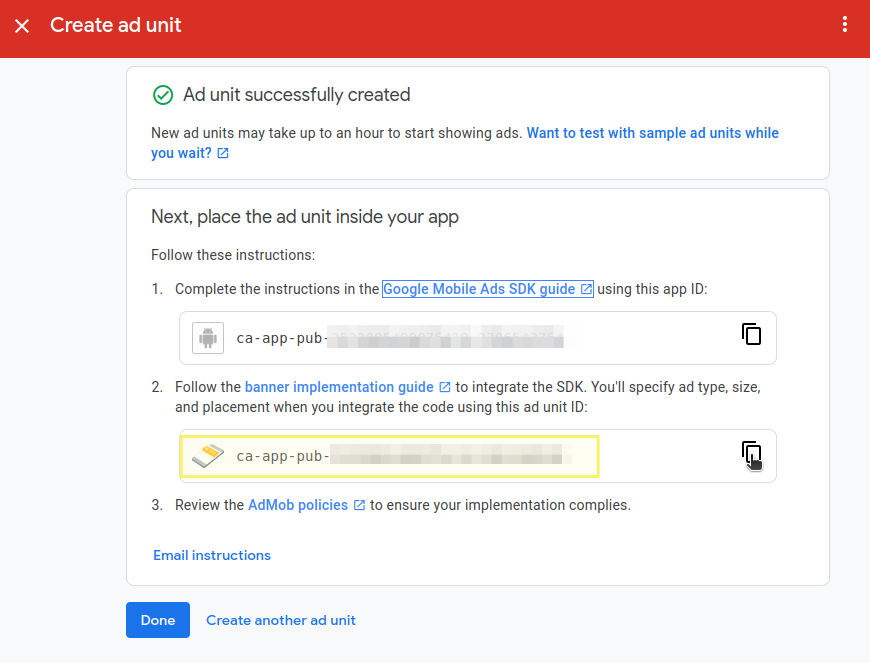
In the next screen, you will have the *Ad Unit Id available to copy. You need to paste it in the corresponding field of the configuration where we previously set the test ids provided by admob.
Press “DONE” and that’s it! You now should have working ads on your game!
Go ahead and repeat all the steps for Interstitial and Rewarded ads.
Testing Interstitial and Rewarded Ads
Once you set everything up, is time to test the other ad formats.
Remove from the scene the BannerAdController as we won’t be using it anymore. Add instead an AdController node, and set the Ad Unit to “Interstitial. You will note we don't have theAuto show` property in this node, so attach a script to the root node to show the ad when ready:
extends Control

func _ready():
    $AdController.show()
You can use the signals provided by the node to control the logic of your game. For example, connect using the editor the ad_closed signal to a method like this one:
func _on_AdController_ad_closed():
    print("Ad closed")
Now run the game again. When the game starts, it should show a full-screen ad. This is the Interstitial ad. Once closed, you should see the “Ad closed” message in the console.
If you want to add a Rewarded ad, you just need to change the Ad Unit property to “Rewarded”. In this case, is very likely you will want to use the ad_reward_earned signal in your game’s logic.
Setting up Meta
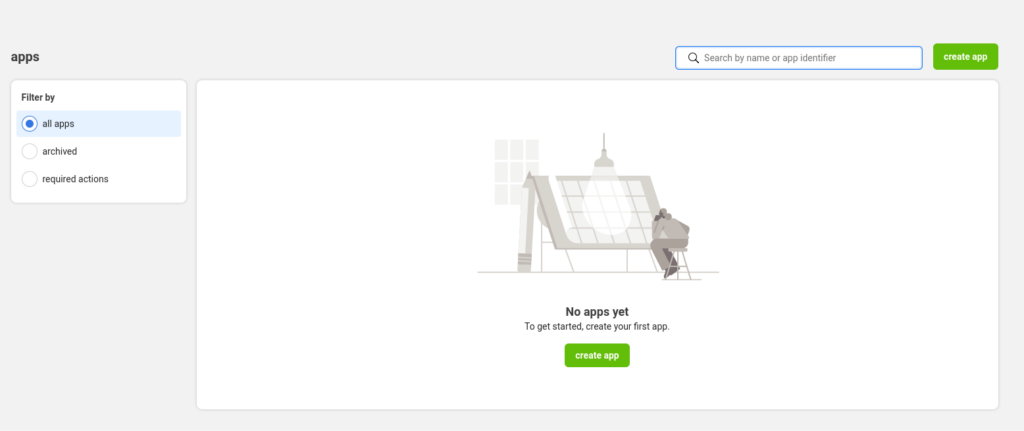
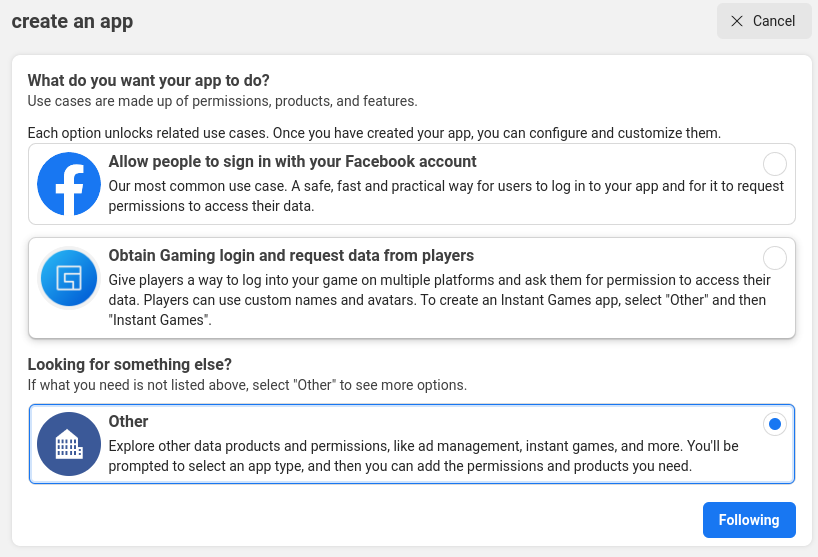
Open a browser and navigate to the Meta for Developers site. Log in with your Facebook account. In the navigation bar, press “My Apps”. If you don’t have any application yet, you will see a green button that reads “Create app”. Go ahead and press it.
You will see a screen that lets you select some basic permissions of what your app will need to do. Select “Other”.
Then, select “Video Game” on the “Select an app type” page:
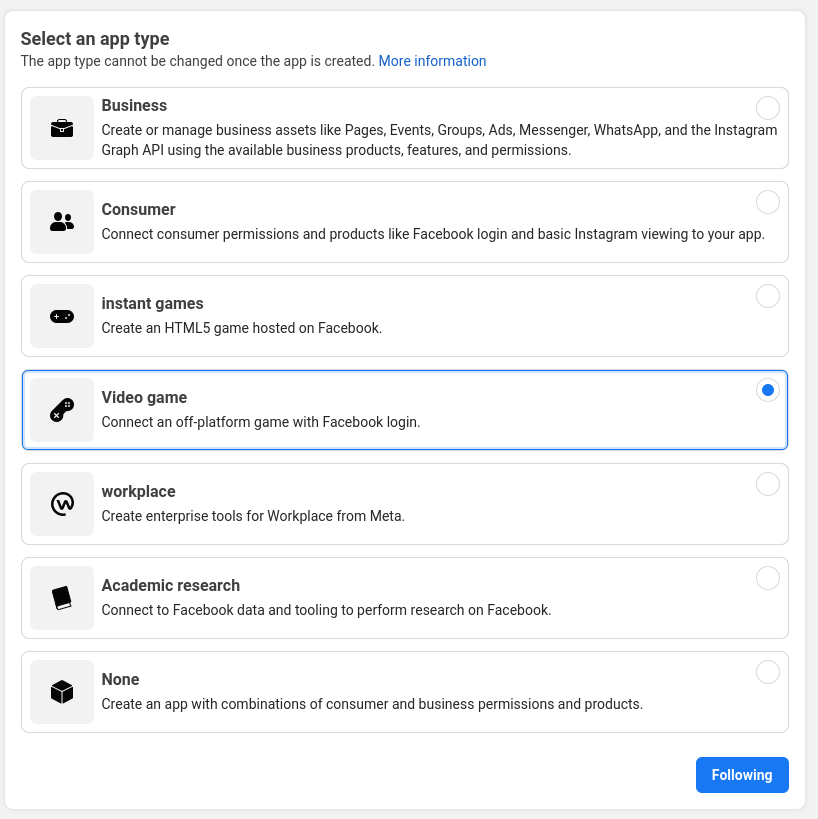
In the next screen, you need to choose a name for your app and put a contact e-mail. After that, you can finish the app creation.
You will be redirected to the app panel, where you can add many different products to your application. In this case, as we are interested in adding ads, look for “Audience Network” and press “Set up”.
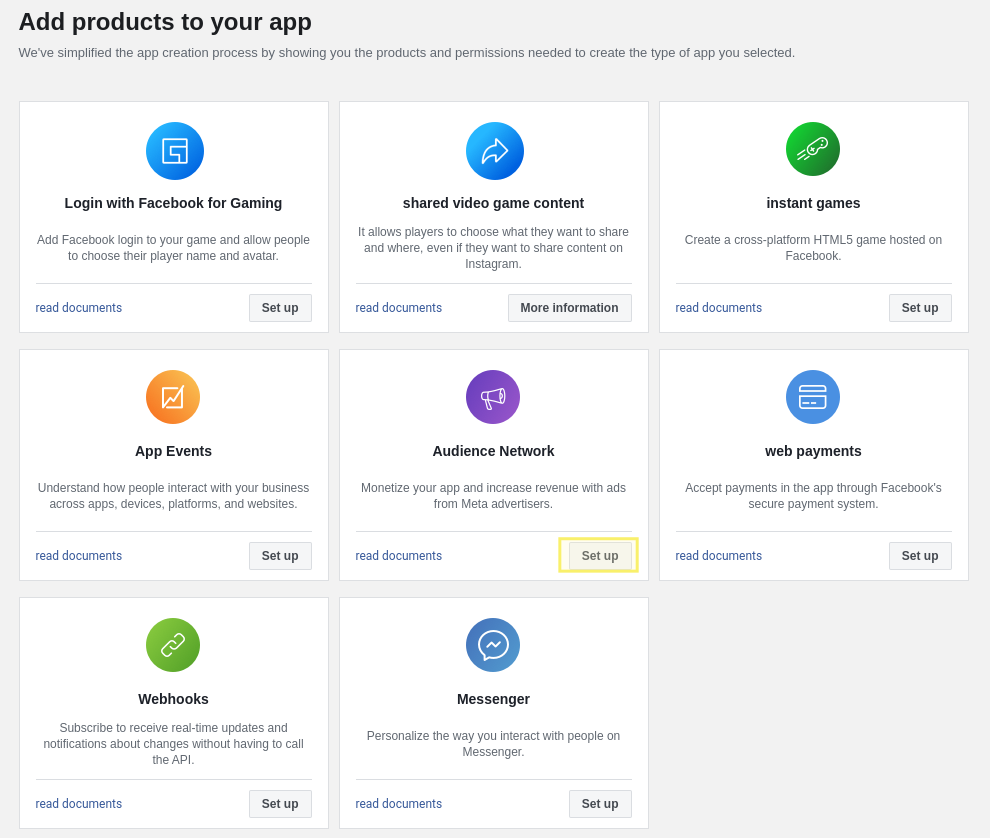
You will see some forms that you need to complete to be able to proceed. Enter the corresponding information to continue. You will have to set a Business name and a property name. Choose something you can identify easily. For this tutorial, I called the property “Games”.
You will be redirected to a page like the following:
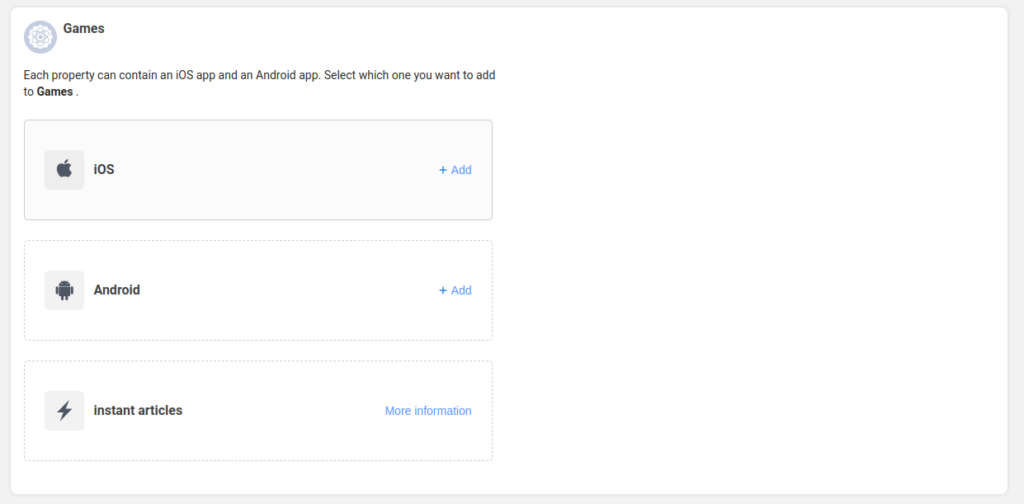
Go ahead and press the Android option. If you have your game already published in the Play Store, you can enter its URL in the form that will appear. If not, just press “Next”. There is also no need to set up a payment account yet, and you can leave that configuration for the future.
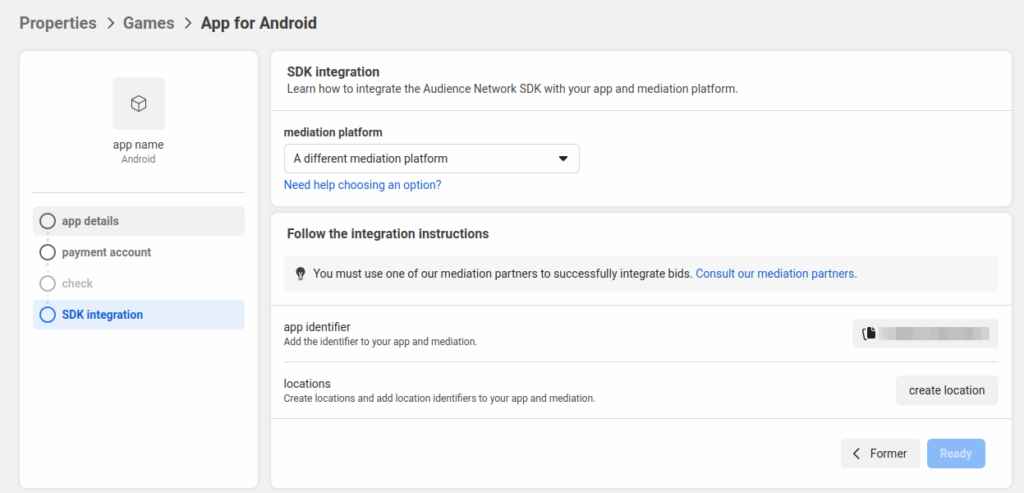
For the “SDK Integration” step, select the “A different mediation platform” option in the drop-down. You will instantly see the “app identifier” below:
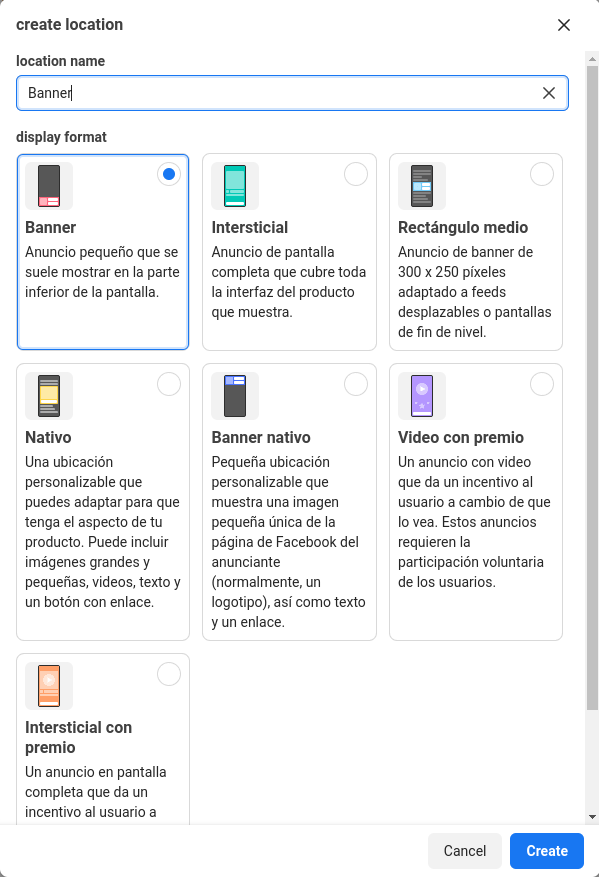
Pressing the button “create location” you can create the different ad types, analog to those defined in admob. Go ahead and press that button, and create locations for Banner, Interstitial, and Rewarded:
All the required ids will be available immediately when you create the locations. You can copy them just by clicking on the numbers. This is all we need for now!
Using meta ads in Godot
Go back to your Godot project, and enter once again the ads configuration in the Project Settings dialog. Enable the “Meta Audience Network” plugin, and set it as the top priority. This way you can easily test everything is working.
Then, in the “Ad units” configuration, add the ids for all of the locations you created previously.
Once you are done with the settings. Launch your game and you will note that now you see Meta ads!
Conclusion
As has been shown in this tutorial, Ramatak Studio provides an out-of-the-box solution for integrating apps into your Godot projects. The ads support shows how we are focused on providing all the fundamental features a mobile game needs and making them as easy to use as possible.
We will continue working on more features, so you can monetize your game without all the hassle it usually involves.
Thanks for reading and keep tuned for more news!